

Here are some of the modeling activities that our members are working on during our Division activity hiatus
Mark Sklar
Like most I have had a lot more time than usual to work on modelling. I have been working on 3D drawings and working with my 3D printer and successfully printed the NYCS signal bridge. I painted a couple and took some pictures.


I'm still working with the 3D printer. The printer is amazing. The first picture is an N scale mountain goat and longhorn sheep made for Doug's Great Northern layout. Doug painted them and they look fantastic. And yes that is a real penny they are standing on. The other picture is the first test print of a 60 foot heavy weight RPO car. It is specific to the New York Central. I did the drawings based on a brass model and pictures I have. It has all the rivets and panels. The diagonal lines are an artifact that will not be on future prints. Some windows need better supports to print square. Overall I am pleased with the progress so far. Keep modelling, stay safe and sane.


Hope all of you are staying safe. For you D&H officienatos, I weathered a GP38-2 for a friend. If the picture appears strange it is a 2 rail O gauge sitting on my HO gauge layout. The road number was changed from 7321 to 7322, so the sides and number boards were changed. The small herald on the front and rear was added. This thing seems massive compared to HO!

Wednesday June 3rd -Hello All, I have been doing drawings of the RPO undercarriage the last 2 weeks. Yesterday I printed it and it came out better than I thought it would. All the air pipes and linkages printed well, even the hinges and handles on the battery boxes were perfect. All the detail seen in the pictures was printed as is, no assembly was required. Just paint and add couplers and trucks. I'm going to try to draw and print the trucks next.


+ + + + + Back to top + + + + +
Rich Smith
Been trying out various weathering techniques for rolling stock but that killer technique still eludes me. I have used:
1. Diluting enamels … blotchy
2. Oil paints … take very long to dry, but can have a nice effect when wiped with a Q-tip or cloth
3. Alcohol washes … there is a lack of control and blotchiness
4. Tamiya panel line washes … good for magnifying grime in nooks and crannies, around NBW details, etc. but not for general weathering
5. Air brushing … shows promise for me, but I need much more practice … or a better airbrush, so much clean up though
6. Pan pastel chalks … similar effect as airbrushing, but when you go to seal it, the effect disappears, left unsealed effect gradually goes away with handling
7. And then that to do with trucks and wheels? And underbodies?
So as you can see, there are a lot of options, but none has been very satisfying for me. The answer is probably a combination, but until I have a somewhat bullet proof technique I am still so nervous about weathering my loco investments. Still looking for that killer method!
I am working on many small projects. One that was fun was taking a Proto 2000 (P2K) Erie Built and dressing it up with some new stainless steel on its snout (see the first attached pic). The part is actually made of stainless steel as is the raised lettering below the side windows! I had to scratch build the second lower headlight with aluminum tubing and plastic lens (the P2K only has one headlight). Those of you who remember the famous Olympian Hiawatha might be asking, didn’t that locomotive have a “chopped” hood and much narrower front windows? Yes, but my second attached picture shows the Milwaukee Road added these accoutrements to the more standard Erie Built design like the P2K, but you’ll notice no SS lettering. So in my world, both the snout and the lettering exist, so sue me!


Another project I have worked on is my Milw Rd bi-level commuter train. I had good timing while train watching at the Wauwatoga train station and caught Extra No. 33 coming in, running in “push” mode. The sequence of shots shows the cab car first, and the rest of the 5 car consist, finally being pushed by E8 No. 33 (Milw named their extras with loco numbers) coming to a stop at the station platform. It is a Saturday and this is the “Girl Scout” special, taking nearly 350 girls to the Wisconsin Dells theme park. Milw Rd made use of their commuter equipment during off-times for both revenue and good PR.
I recently re-furbished 3 extruded aluminum models by a long gone company called “Three Brothers”. I already had two kits I built years ago. Modifications to the original kits include green tinted windows, Walther GSC trucks (scratch made bolsters), Kadee body mount couplers, American Limited diaphragms, home printed “Milwaukee Road” signage, and lots of Flitz polish! I installed a Tsunami 2 EMD sound decoder into my very old and well used Proto 2000 E8, and it works great (I think a 2 amp decoder is necessary for these older locos). Also, added the classic Milw Rd smoke arrestors on the E8.
Finally, thinking about adding a cheap non-sound decoder in the cab car and getting a head light for push operations, and a red light for pull. Right now, there are nifty little clear lenses in the unit, but lights would be cool. Walthers trucks make this pretty easy to do.


Please find some pics of my latest project. The American Crane is a powered Walthers kit (DC). I installed DCC (Digitrax DZ 143 decoder (thank you Irwin!) and have separately controlled rotary beacon, twin forward lights, and a reverse light. The unit was unreliable loosing contact over non-powered frogs so I added the boom flat car and installed phosphor bronze pickups in the trucks. Now it runs down the track flawlessly! The flat car is just an Athearn with some additions. The pickup wires are connectorized between the crane and the boom car so you can still run the crane by itself.
One thing that initially bothered me was that the idler pulleys jigged and the boom moves as it runs down the track. Then I found a YouTube video of a real one, and guess what, the real pulleys jiggle too and boom moves! I also got it right to put in two figures in the cab (see video)Take a look


One last couple of pics of those famous Milwaukee Rd bi-level commuter cars. Since they were operated push-pull, and since it is interesting to watch them in push mode, I just had to add LED lights to the cab car. I’ll let you guess which lights are for which direction, all synced up with the loco of course. Since the double headlight is so close to the roof, I had to use a clear plastic “light bar” (can’t think of a better word right now) that let me mount the LED away from the actual holes. Turns out, I had a “light bar” laying around because I put DCC and lights into an Atlas RS unit and had to remove it to fit the decoder and speakers. Good to keep old parts sometimes!


I just finished a tank car too --- see attached! Went to Ebay, made a few mouse clicks, opened a box that came in the mail, opened the box the car came in, and set it down on my table. Whew, I beat. I need a nap!
Regards guys and keep on modeling

Wednesday June 10th - Gents, hope you are all doing well. My projects have slowed down a bit with warm weather, house projects, and work schedules. But here’s the next installment on the Milw. Rd Ft ABBA saga. I finished #47B booster unit. The first picture shows the nice close coupling between A and B units using American Standard diaphragms especially made for Stewart Fts. They can negotiate 22 inch radius. The second pic is a close up of the B unit showing newly installed grabs, lift rings, etc.
This B unit is not powered. And that brings me to my DCC strategy. Four sound decoders for an ABBA set would cost ~$400. Since model railroaders are cheap (especially me), I am going with the following strategy:
Unit 47A – Powered - Sound decoder w/ speaker
Unit 47B – Dummy (but extra speaker wired thru diaphragms to 47A unit)
Unit 47C – Powered - Non-sound mobile decoder (but extra speaker wired thru diaphragms to 47D unit)
Unit 47D - Powered - Sound decoder w/ speaker
This saves me the cost of 2 sound decoders (mobile decoder was only $20) and one powered loco. Three powered locos are more than enough power to pull my longest trains and then some. I can also run an AB set with either one powered loco or two powered locos, so lots of flexibility.
One thing that has always bothered me about lash-ups of multiple sound locos is the sound emanates exactly the same from each engine. My solution? The Tsumani’s have two EMD 567 16 cylinder prime mover sound chips available. This gives variability between 47AB and 47CD. If you don’t have different sound chips (most common) the Tsumani has another nice feature called “pitch shift”. This lets you change the pitch (higher or lower frequency) of each decoder. When we train watch, we all notice each engine has a different pitch. I will use this two.
Next installment I will talk about speed matching multiple locos with usage wear & tear and with different decoders! That’s all for now guys! Best, Rich


+ + + + + Back to top + + + + +
Bob Mohowski
Commenting on Rich's crane project above:
Your American Crane project reminded me of a story involving such a machine on the CP. Somewhere in the Canadian Rockies an M of W crew was at work when a grizzly bear showed up and chased a workman. He headed for the crane and climbed the boom. These bears, unlike black and/or brown bears, cannot climb very well however the bear hung around the base. The worker fortunately had some fusees. He struck one and the sulfurous fumes discouraged the bear. I think the story was in TRAINS Magazine. I've always carried a fusee in my fanny pack when hiking after that. To my surprise, I've seen more bears when I hiked in NJ and only one in the ten years I've been up here.
Gents - A safety idea. I've soaked two rags in denatured alcohol and keep them in plastic bags in each car. I rub them on my hands every time I leave the car and wipe down the steering wheel and all surfaces I've touched before entering the house. Also have a "dirty table' where incoming items are place before a wipe down with such rags before they come further into the house. Just a thought.
+ + + + + Back to top + + + + +
Geoff Wood
In regard to weathering technigues:
I really liked weathering with floquil in various dilutions. I have had a Paasche VL double action for years. Lots of control was the thing. Practice and experience counts. When Floquil and Dio-sol was discontinued I stopped. Prep and clean up do discourage one.
I have mostly settled on Pastel Chalks which I have used for years. I still have the 2 boxes I got from Soive Faire in the eighties. One Earth tones and one grays. I have Pan Pastels but am not to fond of them. Dull coat does make effects disappear. On Kadee cars and other semi gloss cars I spray first with dull coat and again afterward. Accurail cars are very flat and weather well and don’t lose as much effect when flat coated. I do weather my locos but it is traumatic. Some have turned out well . A few have not, but are not bad enough to not use.
I don’t use India ink/alcohol at all on cars, and not much on structures. I do use it as the wetting agent on some dirt roads or gravel parking lots. It weathers in one step.
I have not used those other techniques. I have seen good results from oil paint and turpenoid. I doubt if I ever will. Lots of prep and cleanup and drying time,
+ + + + +
I reconfigured the bakery and did some scenery. A little more landscaping. The workers left a little gravel on the stairs and the store and office need signs.
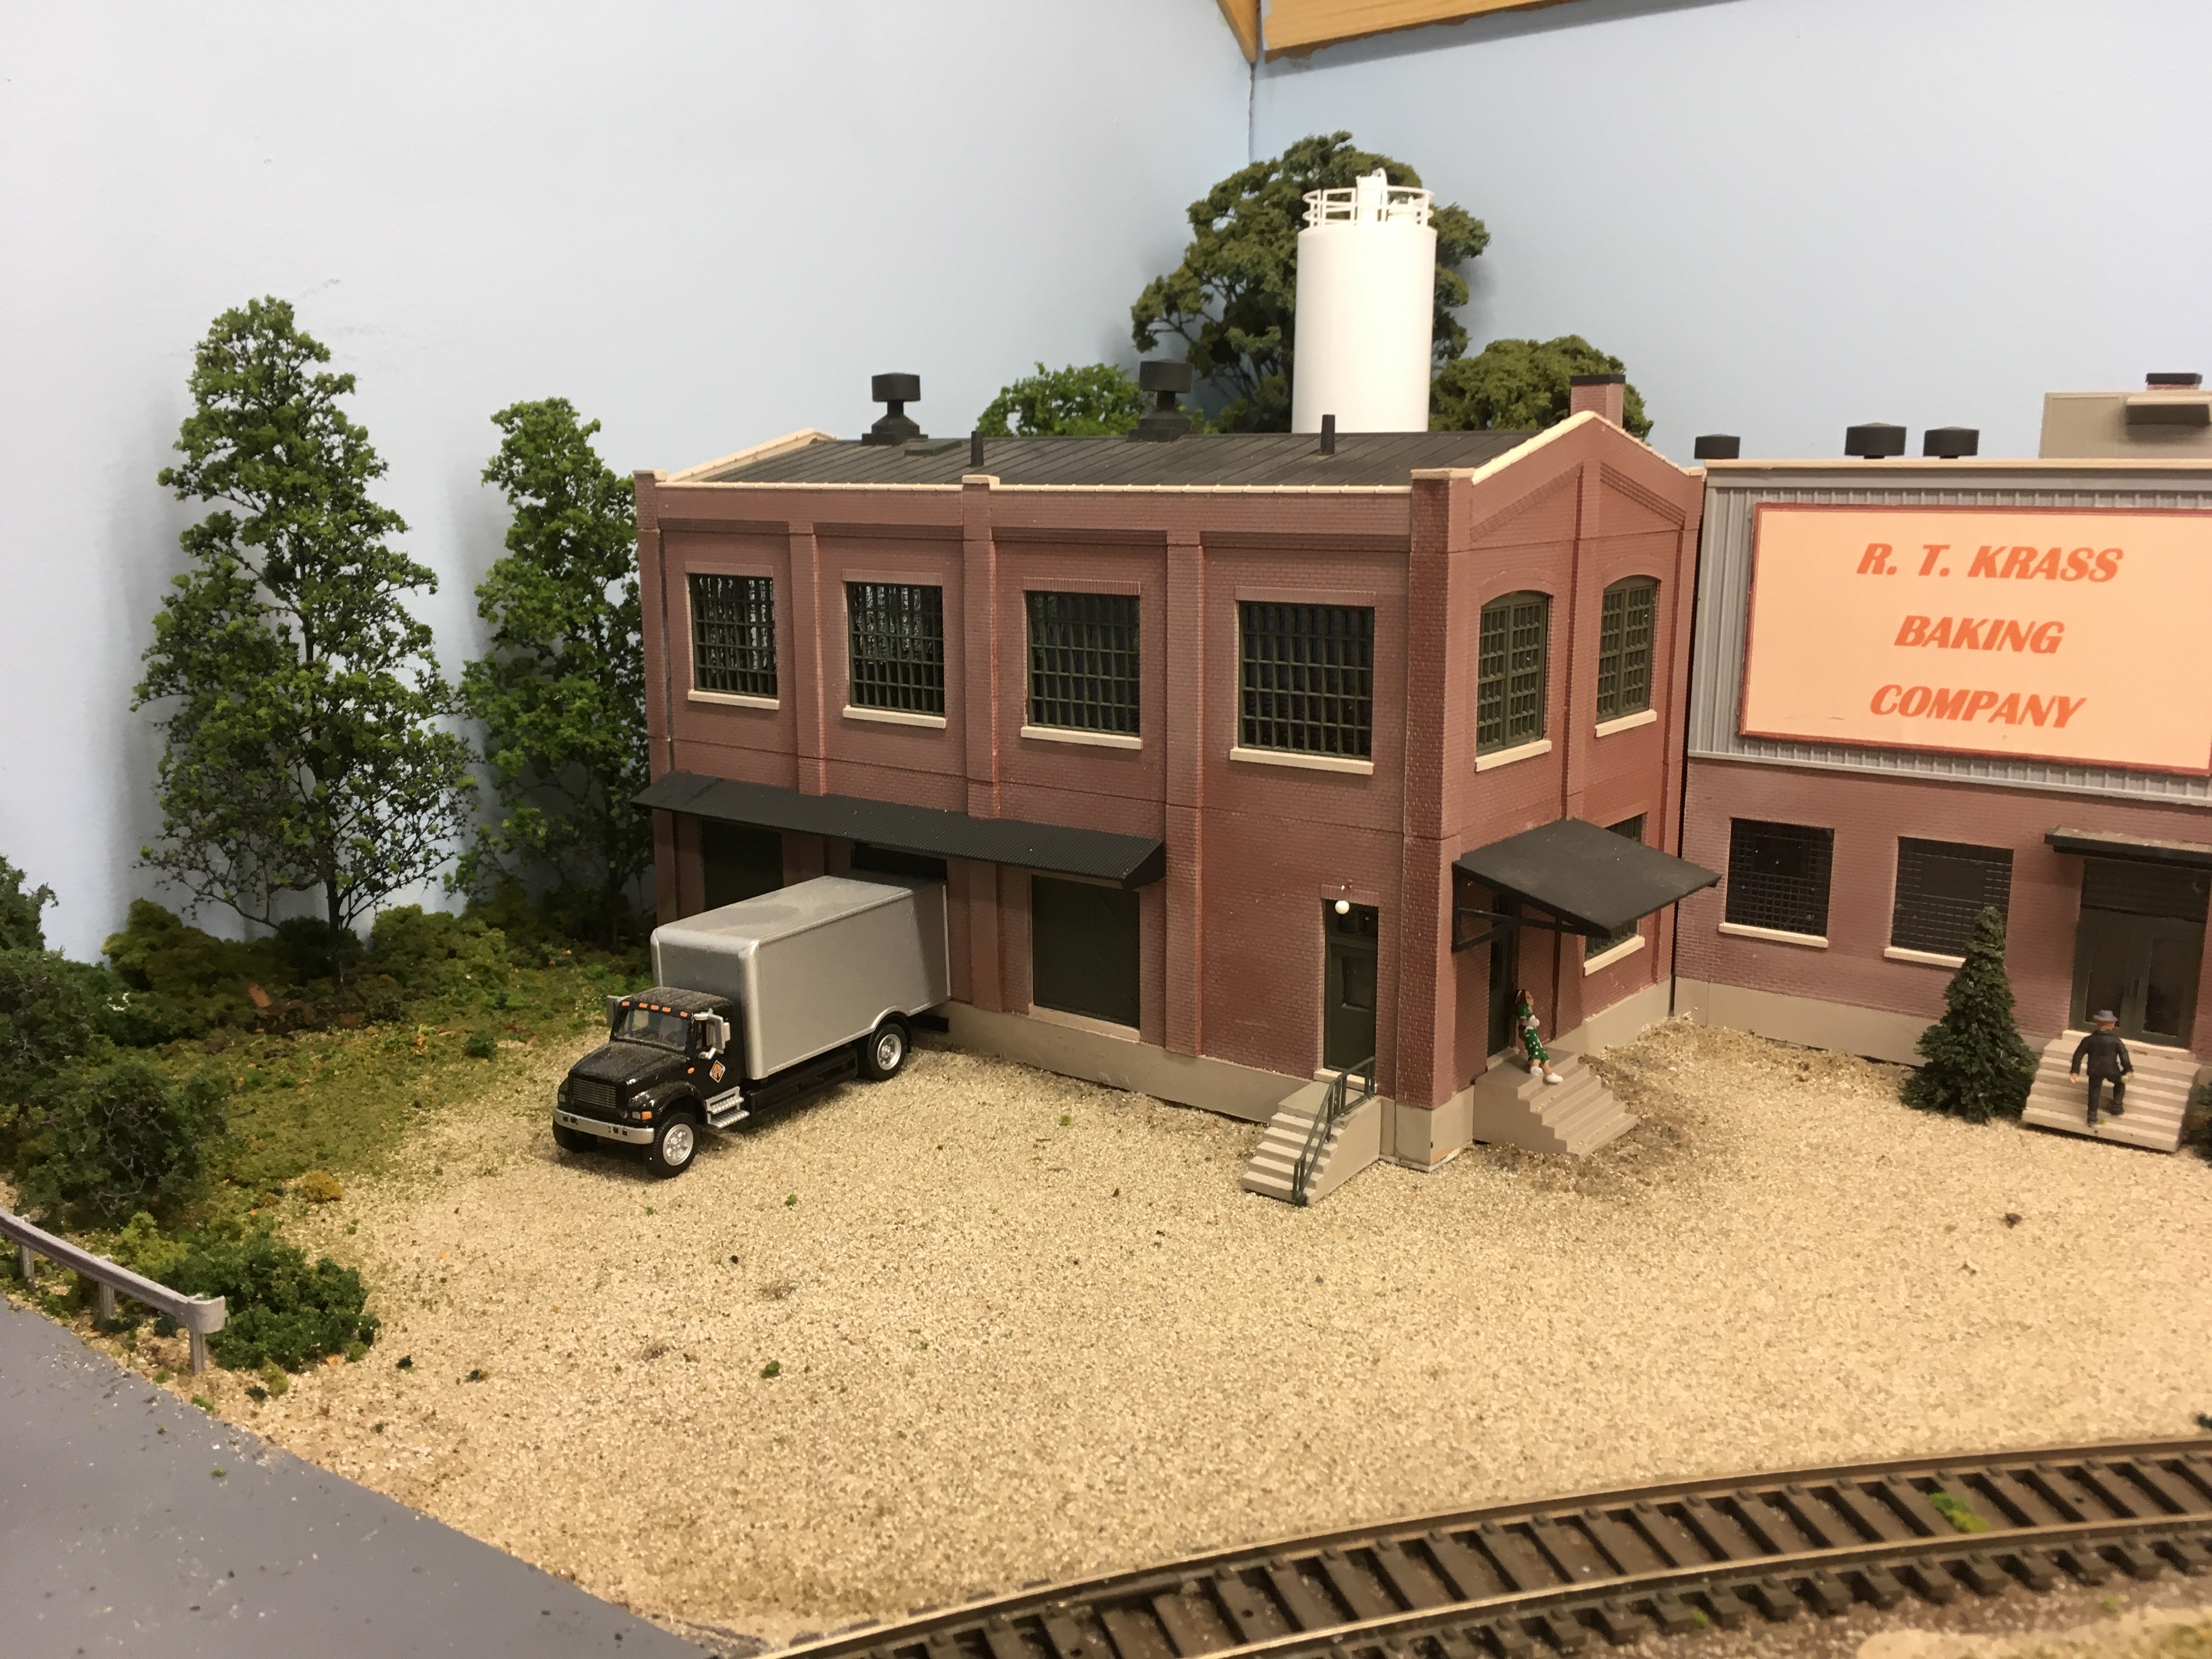


Below are a few photos of the projects I have been working the past few weeks of this Mess. They are the R.T. Krass Bakery scene and an Atlas/Kato RS3 that I painted and lettered for the MTR. I also installed a V5 Lok sound decoder. I used a ESU sugar cube speaker and installed LED lights. The Alco 244 Prime mover sounds great. Stay safe and Well,


Below are 2 photos of a Atlas/Kato GP7 that I recently painted, lettered and partially detailed with 3 chime horn and Steam boiler details. I also installed Sountraxx Econami sound and I Phone 4 speaker. I will do anything to keep avoiding Static Grass application!


+ + + + + Back to top + + + + +
Bob Hamm
I like the discussion going on about weathering, and it's great beyond the specific subject because of where we are with the pandemic. Many of us are hunkering down at home and spending far too much time in front of the tube, myself included. Okay, so let's make the best of it and use our wonderful hobby as a distraction from the 800# gorilla. We can think about and work on our trains and layouts without any fears and even better though we can't have our weekly face-to-face meetings, we can have a running email thread about all the things we are doing in the hobby, sharing techniques, tips, and above all our friendships through the hobby.
Now about weathering, for engines and cars I use my airbrush, like Geoff, I think, a Paasche VLs and Floquil paints, the supply of which is dwindling. For wood structures I have developed a technique starting with a dark solvent stain over which I apply streaks of acrylic paints. This works very well and is very controllable.
My current project downstairs, (started yesterday), is the installation of stock pens (cattle and sheep) on my layout at Old Placerville. A Banta kit, I built the chutes in Florida and am currently laying out the corrals to fit the available area. See the photo below.
I have been working on a set of stock pens which is pretty much done except for sprinkling on some dirts over the Masonite base. The dirted area you see in the photos is a piece of cloth with dirt sprinkled on over a coat of paint, which I will not be using. Next project involves installing two bridges, one a railroad bridge the other a road bridge into Bakersville.


Hope all are hunkering down and staying home. Been busy myself. Installed two bridges, railroad and road, into Bakersville and put finishing details in Mineral Creek, which flows under them. The area is now done. Here are a couple of photos. On to the next project. Stay busy and safe
Here's a few shots of my latest project, the Katie Elaine mine. The mine itself was built by Rich Cobb for me some 35 years ago. I recently transplanted it to a new location starting about a month ago. Easiest to share it in Power Point.
My latest project - Texaco Warehouse - Easiest to share it in Power Point.
Old Placerville - Well boys, it's done at least until I find something I want to change. Here are some photos.


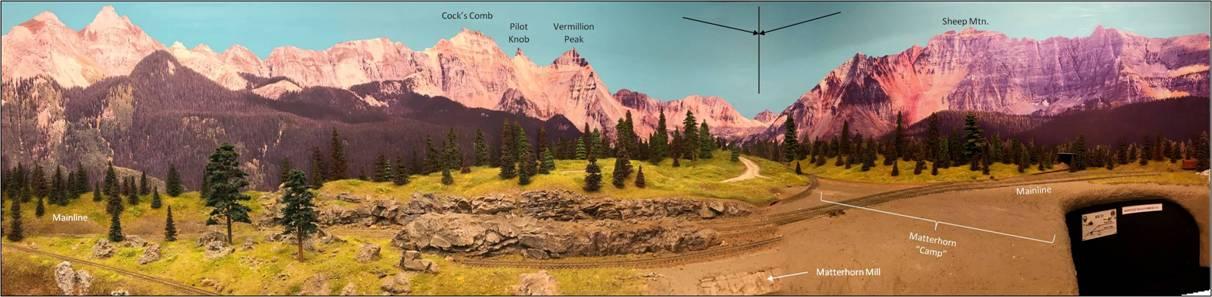
Sunday June 14th - Hi Guys, Pushing hard on Matterhorn scenery. The background scenery is done. The attached photo shows a panorama of the area . Going from left to right the scene goes along one wall about 8 feet then around an inside corner and then six feet along the adjacent wall. Grassinated and added polyfiber with ground foam on top then planted the conifers, lots of them, likely around 300. May add some deciduous here and there. Super trees are my favorite. Track heads up on a 3 % grade on the left to the siding and wye at Matterhorn. Note the location of the Matterhorn Mill, (removed for the scenery work). The background is actually what you see looking east. Sheep Mountain is the big one to the right. The pointy one to the left of the "notch" is Vermilion Peak as well as Pilot Knob and Cocks Comb just to its left. There is a little settlement at Matterhorn, but mainly it is a camp for the mill workers and railroad folks. That is in the unfinished area in front of and to the right of the wye. Will be working on selecting/building the structures for Matterhorn and installing the mill, which is built. Hope to finish the area in total this summer. Bob
+ + + + + Back to top + + + + +
Joe Kavanagh
Just typical days here at the railroad. On Saturday, two teenagers, Daisy and myself had gathered wood and other debris. We made four trips to the dump with the trailer full of limbs. Sunday I chainsawed the logs to length for splitting. Monday one of my teenage helpers came and we both split and stacked the wood.
Then we loaded the trailer with limbs (less than 3" in diameter)and 4 garbage cans of needles, etc.

So, what about things for the railroad? This winter I have been working on six tank cars and four structures. Two tank cars and one structure have been completed. The remaining four tank cars and three structures are all under construction. I'm working, I'm working. I can only work so fast.
Tonight I finished up signs for various things on the railroad. Some are replacements for worn-out signs, four are for the four structures that were placed on the railroad in 2019.


Making stuff. Here is the material I use for casting nowadays.

Here is a photo of the sequence of work.
Clockwise from 11 0'clock, first is the master out of styrene and in a casting box. Then the mold, then a rough casting pulled from the mold, then a casting cleaned up and with a primer on it, then a painted casting, then a casting with black styrene ACC'd to the back. That's a finished window ready for a structure. Each window is 4" x 4" The structure it is to go on is not built yet. Designed and the two long sides cut and framed, but not assembled. My shop is too small. The structure will be built, all in good time. Valspar used to make the primer but sold the division. It is called PlastiCoat It is no longer available. It used to be available in four colors. Oh well.

Here is a building I'm making now. The windows it is receiving are 4" x 8". The building is 2' x 8' x 30").

First I put construction adhesive from a caulk gun onto the building where the window would go and pushed the window into it. Then a couple of days later I laid a bead of gray caulking around the perimeter of each window to seal them and hopefully to help keep them secure to the plywood building core. Then few days later (today actually) I prime painted that one side. I have sand paint on hand to finish the sides to look like gray stucco. That will be the one of the last things to be done to the building, but before I add the roll roofing. This building takes 22 windows and three doors. The doors will be made one-off out of styrene, no molds, etc. The building has already been turned upright and I'm working on the other sides. A week here, a week there. Someday it will be done! I expect this structure to be the creamery building in the town of Rockwell Falls.
Spending some time working on tank cars. Two were completed recently and already shown to you all. I spent some time and made car cards for all six tank cars. They are shown on the walkway of the car in the photo below. I'm preparing for the 2021 operating season. Two more tank cars are looking like this photo
Three frames are visible in photo 1. The top one has the tank fastened to it. One behind the camera is just the same. The next steps are hand rails, ladders, dome platforms and lettering. Photo 2 shows the tanks of the final two cars. They both are only partly painted. When they are, they will be fastened to their frames, etc, etc.
Painted the bottom of one of the two remaining tank cars needing painting - photo 3.


Next on the list of parts to be made are brackets for the dome platforms (and the platforms themselves) for the four cars. Then there's the ladders, the railings themselves, etc. Much more to be done. Have a good week all!
I did it. I wanted to finish this car by tonight and I did it. It did take 8 hours of work today, plus countless hours previously.

I did it. I wanted to finish this car by tonight and I did it. It did take 8 hours of work today, plus countless hours previously.
There are now two Tidewater tank cars completed. One car per week! If I keep up this pace of one car per week, in 5 years I'll have about as many as freight cars as most of you HO and N scalers have already. Alas and alack, I started the tank car project in 2018. Not 2019. Yes 2018. At that rate of 5 cars in almost 2 years, it will take me 100 more years to get those cars. I'd better get back into the basement.

But before I go, here is a photo taken today: Four of the cars are out of the basement. I added engines and a caboose (and a Rutland hat) and took the train twice around the railroad. No derailments or problems encountered. I'm happy. Spent some time this afternoon chainsawing leaning and broken trees in and at the edge of the field. Tonight I rest. Tomorrow I work on the sixth tank car.

It was a busy week, but I cannot report any project completed. The three projects in process did see work accomplished. Here are the details.The Ice House awaits a final detail:These are the roof ventilators. The ventilator in front has all four sides completed. It only needs basswood roof sheets to be added. 4x4 blocks are the cores as can be seen in the unfinished ventilator in the rear. I cut the bottom of the 4x4s in a "V" to match the ice house roof and then moved the cut out portions to the top of the ventilators so the roof slope for them is the same as the building roof slope. One hole has been drilled through each ventilator at the ridge for a screw to secure them to the roof of the ice house. Roll roofing will cover the screw and will be added when the ventilators are already secured to the ice house.

Next is the Rockwell Falls Creamery building: All the windows and doors have been applied and two coats of sand paint added on top of a primer.The building awaits warmer temperatures so roll roofing can be more easily applied.

And last but not least, the sixth tank car is getting lettered:It's a slow process. After the lettering, dome platforms and tank railing will be applied.So that's it from me for this week. Hope all of you are keeping busy and staying safe. Joe

I've always been slow on production and have so far enjoyed the opportunity the isolation the pandemic has provided to get things done. No events are planned for here this year so production can continue right on through the summer. Here is the first of the winter project structures to be put out on the railroad.Got the ice house finished and set in place. It started to rain even as I snapped this photo.
It is located at the west end of Henderson Yard. On the track map it is called West Henderson. Now the refrigerator cars and milk cars can be iced before they are loaded with products.
On to the next project. I still have to finish the sixth tank car. It may only take a couple of days of work to accomplish that, but I've been busy with other things. My helpers have been here and much wood debris has been gathered in the woods and set along the track for later pick up by work train. Have a good week all - Joe

Wednesday May 20th Joe wrote - Hi all. I told you last week I'm slow producing things. That prepared you for this report which tells you I did not meet my goals for the week. I did not get to finish tank car #6. I did make some progress toward that end but did not reach the finish line. Maybe next week? I did have my helpers get the creamery building out of the wood shop and on to the work flat. That then enabled me to roll it over to the site where it is to go. Before finalizing where it was to go, I had consulted the General Superintendent of the railroad. She agreed the location I had chosen did not work well. The second location I proposed also was not approved. The site she chose is entirely within a garden area she had planted when the tracks were first laid there in 2005. My task would be to remove the plants that interfered with that chosen location. I did that. Then I installed the foundation and my helpers put the building on it.

The removed plants are in pots, buckets, a tray and a garbage can lid. The reason the creamery is covered with a tarp is because I have not yet installed the roll roofing to make it weatherproof. Maybe next week? What did see progress was cleaning up the wood debris around the railroad. My helpers gathered much brush and stacked it in piles along the railroad.

So far this year 19 trailer loads of debris have gone to the dump. Many more piles, including the two seen in this photo, await.I sacrificed and took time to use a work train of four gondola cars to move logs from the woods. The dump will not take logs.

Odd shapes are piled in the foreground, neat logs are piled behind them. There are more logs still in the woods awaiting additional sacrifice on my part. Woe is me, I'll have to run a train. This pile must be cut to length, then split, stacked, dried and burned. Maybe some day? I did hold three burn sessions of 3 to 4 hours each this past week so when this batch of logs is cut and split, there will be some place to stack them to dry before burning.
I did also continue repairing the railroad signal system. I am not sure why but over the winter a fair number of logic boards had failures which did not let them function properly. One by one I identified the failures and repaired the boards. The one board I could not get to work properly is the one board that really got fried in last year's lightning strike near RH Tower. It was repaired last fall and worked then but not now. I replaced it with the one spare board I have.
For the electronically savvy fellows among you, two different transistors are failing this time around the railroad:
I had to replace about 10 of the 2N5306 transistors. Each board may have three or four of them between the track common and the opto-isolators on the board. This is part of the input sensor portion of the circuit. They are easy to replace as they are in sockets. I found that if any of the three leads of the transistor shows a continuity between any of the other two, the transistor is bad. Out it comes. What is odd that of the three or four of them on each board, only one was bad. Only one failed by not turning off, the rest failed by not turning on. If it fails by not turning on, the train is not detected in the block and the signal stays green. If it fails by not turning off, the signal stays red when there is no train in the block.
I had to replace a much smaller number of the TN3019 transistors. Each board may have two or three of them between the input sensor portion of the circuit and the LEDs on the masts. They are the LED drivers which turn on the output LEDs when a train is detected by the input section of the circuit. Again, only one of these transistors on a board went bad and there was not a direct correlation between the failure of these transistors and the 2N5306 transistors. They were not usually on the same board. If all other things are working correctly on a board, I can short out the two outside leads of the TN3019 transistor and the LEDs on the mast will light up. That shows me the transistor is bad. The tricky part is that these transistors are soldered onto the board. I have to disconnect the 19 or more screwed-on input and output wires and take the board into the basement to remove and replace a bad TN3019 transistor. Do that a number of times and it becomes tedious.
I also found a small number of soldered joints had broken in the signal masts themselves. When that happens one or more of the LEDs in a head stay dark. Last year I had bought a butane-powered portable soldering iron at Harbor Freight and it works great to perform these repairs in the field where I do not have a source of 110 volt power.
I do have one accomplishment I can tell you about this week. This afternoon I did finish repairing all the signal locations on the railroad that were afflicted by these problems. Done. Yippee! For now.
I still have three board fried by the August 2019 lightning strike that do not work. They are in Henderson Yard. Two at Bucca and one on the signal bridge. Some day?
There you have it: What I did or did not do this past week.Til' next time, keep busy and have fun.Joe
Wednesday May 27th Okay, at 9 PM it is a bit late in the day, but from 4 to 7 PM workers were here, from 7 to 8 PM Daisy and I were feeding plants, and from 8 to 9 PM I took a train ride. So here it is. Short and sweet.
Tank car six of the series is done. Daisy is happy it is not another black car. No more tank cars for now.Have a great week all, Joe

Wednesday June 3rd - Another week, a bit more progress. Rockwell Falls Creamery is in place. The signage has been ordered. A couple of last minute details still need to be made. Biggest of them is the set of stairs for the passageway door to the right of the loading platform. I have the ideas in my head but the physical material is not on the property to make the stairs just yet. Have great week everybody. Joe

Wednesday June 10th - It has been another busy week. A couple of wind storms brought two more trees to their knees. My chainsaw is out for repair so tackling the trees will have to wait. My helper loaded two more trailer loads of wood debris from the railroad and I brought them to the dump. That makes 25 loads so far this year. The railroad is looking good.
Two milestones were reached this week.
First, I decided to add 14 feet of track to one of the industrial spurs at Deer Run so I could place a second industry on that spur. Laying and ballasting that track provided the first milestone. There are now 10,562 feet of track on the railroad. My math says that is two feet more than two miles of track. Two miles of track. That's the milestone. I did not have to make any track for that extension as I had it on hand as I'd been trying to decide where to lay more track for over a year. Now that's done.
The second milestone did not take so long to accomplish. A couple of months ago Bob Mohowski lent me the Model Railroader book on "Industries Along the Tracks". Right on the cover was an industry that fit right in with the six tank cars I just finished. So after the tank cars were out of the basement, parts to make the new industry took over the workspace. Back in 2007 I used 10 foot lengths of 4" PVC pipe as runners when I needed to drag the seven sections of 9 foot long and 5 1/2 foot diameter gasoline tank sections into place to make Friendship Tunnel. So those 4" PVC pipes have been laying around without a purpose since then. Hmmm. I think I know what I can use one of those pipes for. A little bit later and now that the industry has been completed and has been installed on the new spur extension.there is one less old PVC pipe awaiting a new purpose.
Here is a photo of the new industry at Deer Run:
"Petrol Fuels" is the name of the company. The lettering has been ordered and the sign will be installed when it arrives. Simple, but it will serve the purpose of having a destination a tank car can be delivered to.
Thank you Bob Mohowski for providing the source for the idea for the industry.
I wonder what I'll do next. Hmmm.
Onward we go! Have a good week everybody.
Cheers, Joe

+ + + + + Back to top + + + + +
Mike Hachey
What I'm working on. Stay safe everyone


Foscale kit of the month. These are fun.


+ + + + + Back to top + + + + +
Irwin Nathanson
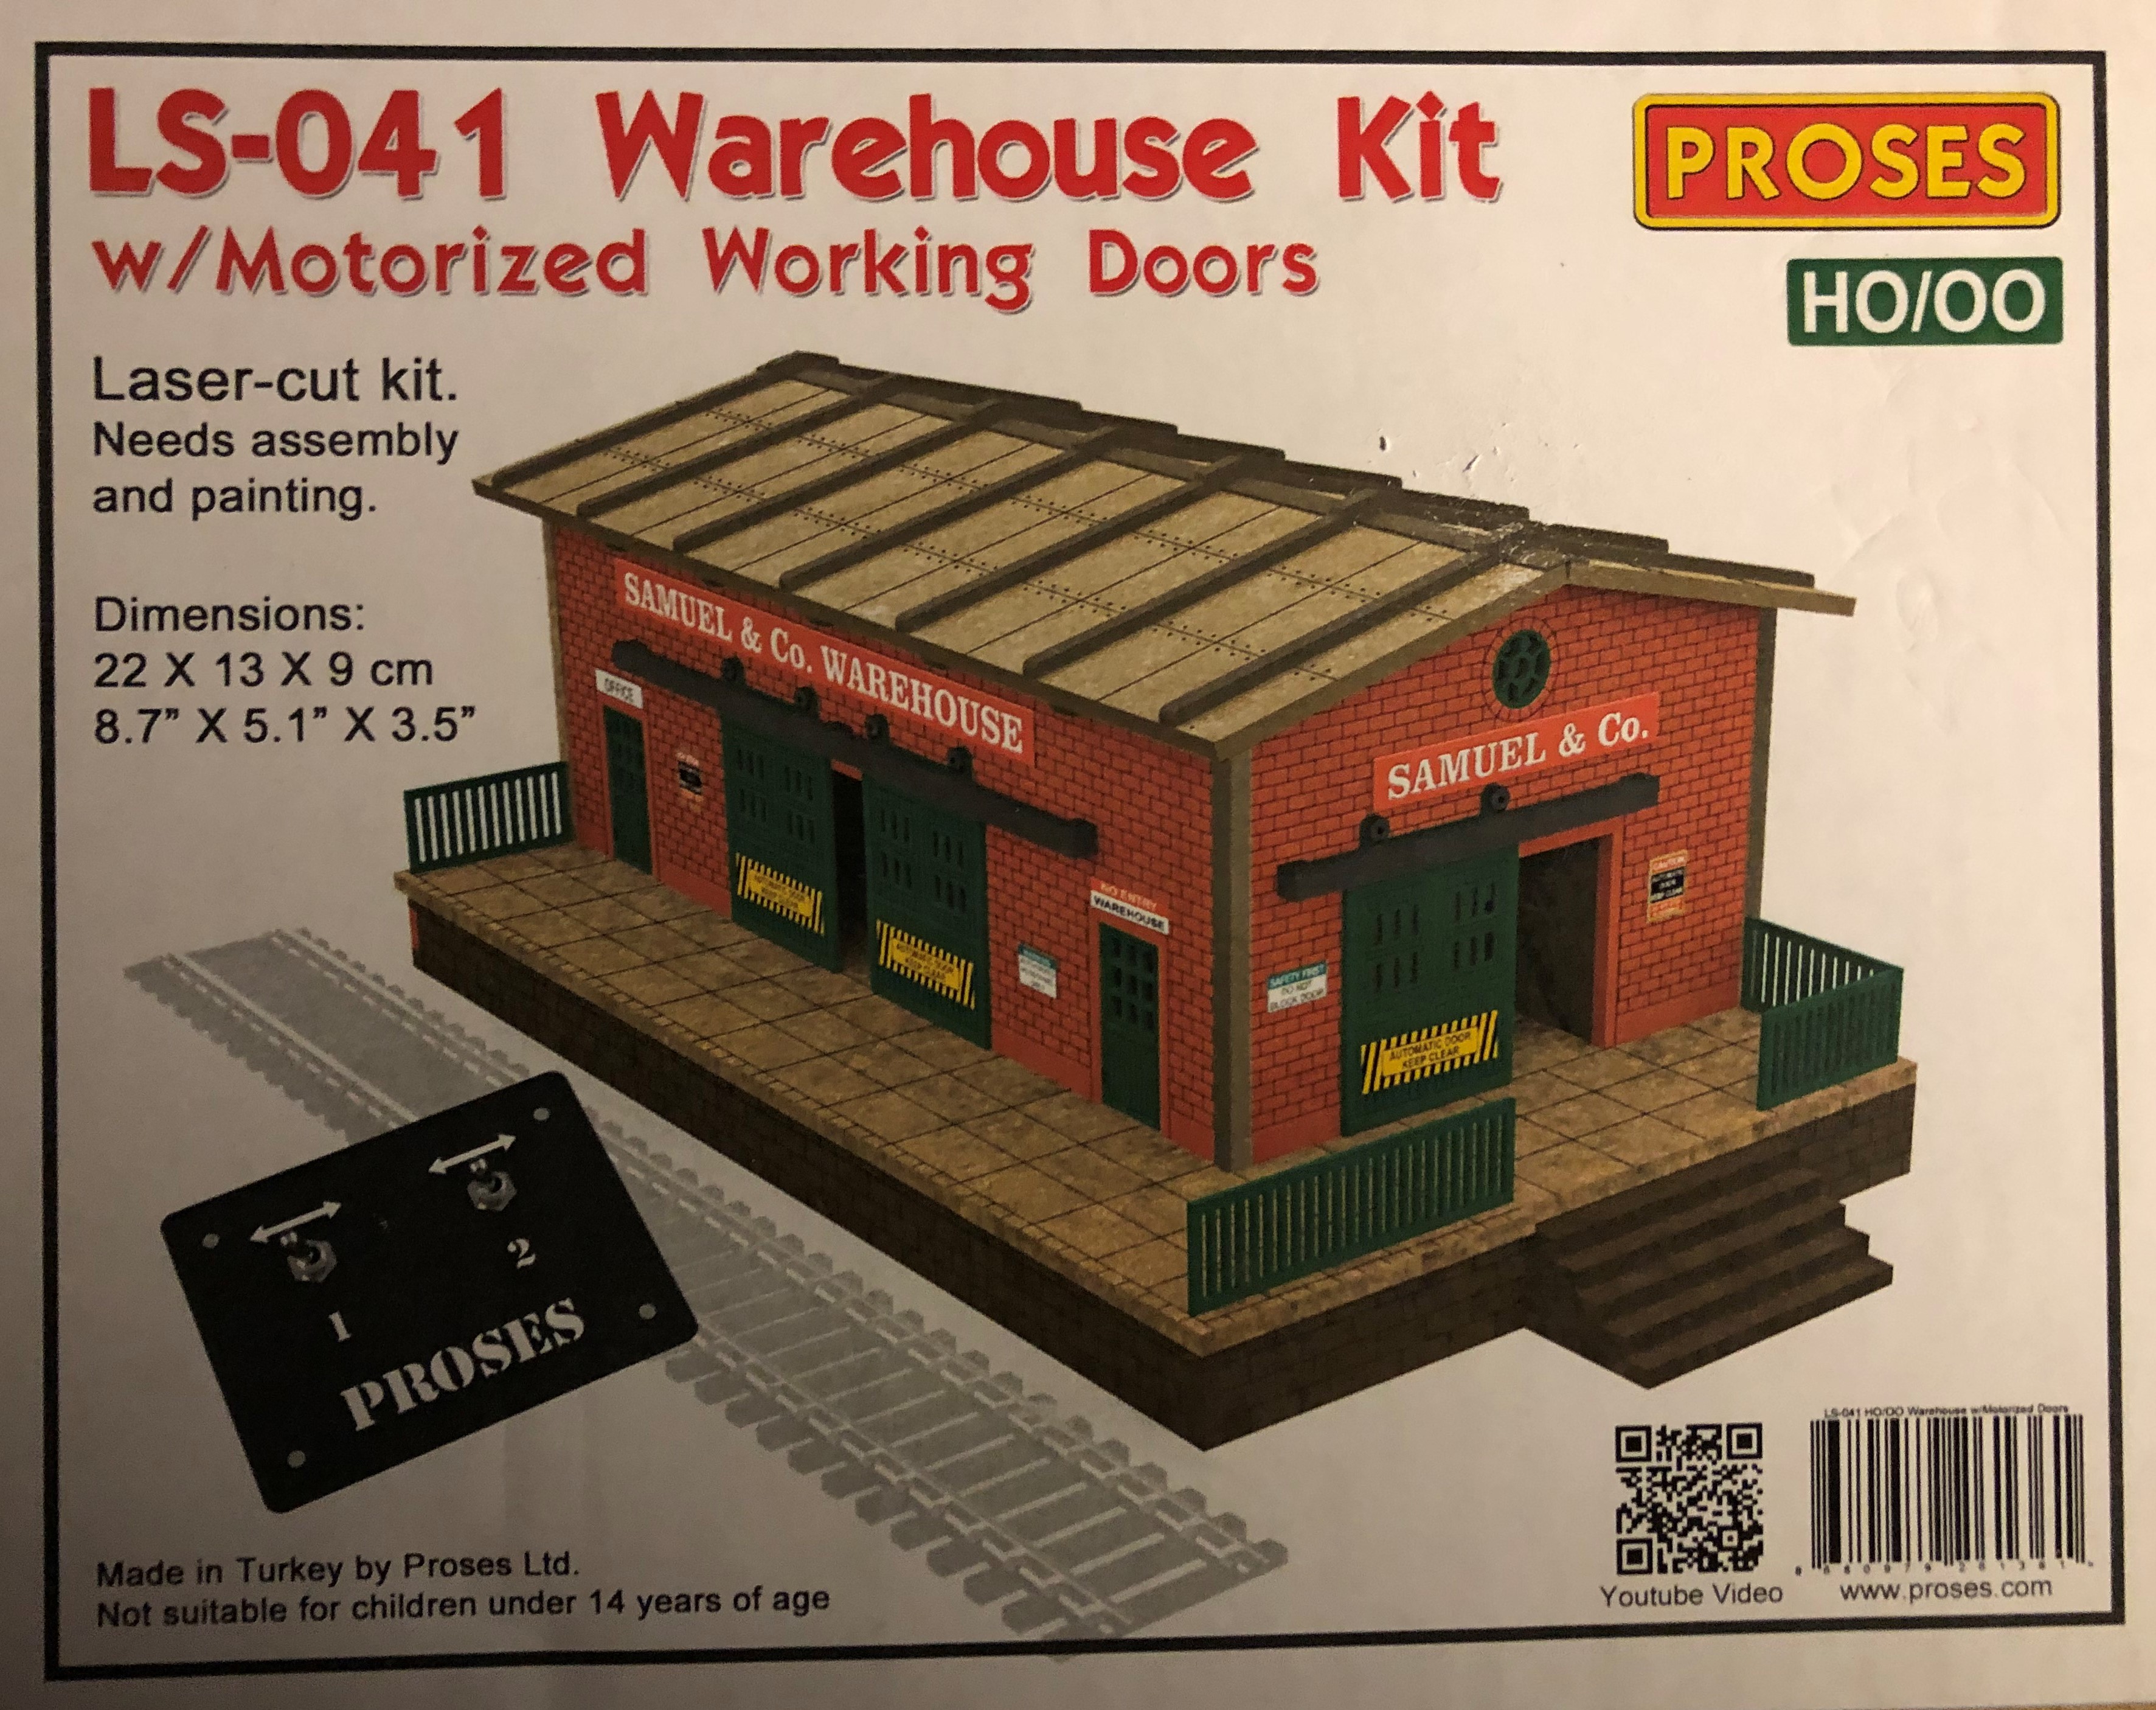
I’ve been working on a laser cut kit from a relatively new supplier: Proses. They are located in Turkey but they’ve got a good web site and they ship direct to you via DHL at reasonable price.
The parts are all laser cut wood, seems like a type of Masonite.Kit came with two geared motors, pulleys and two long O-Rings which connect to the doors and when rotated they pull and push the doors from side to side. Really well done. Comes with a control panel with momentary switches to control each side."


+ + + + + Back to top + + + + +
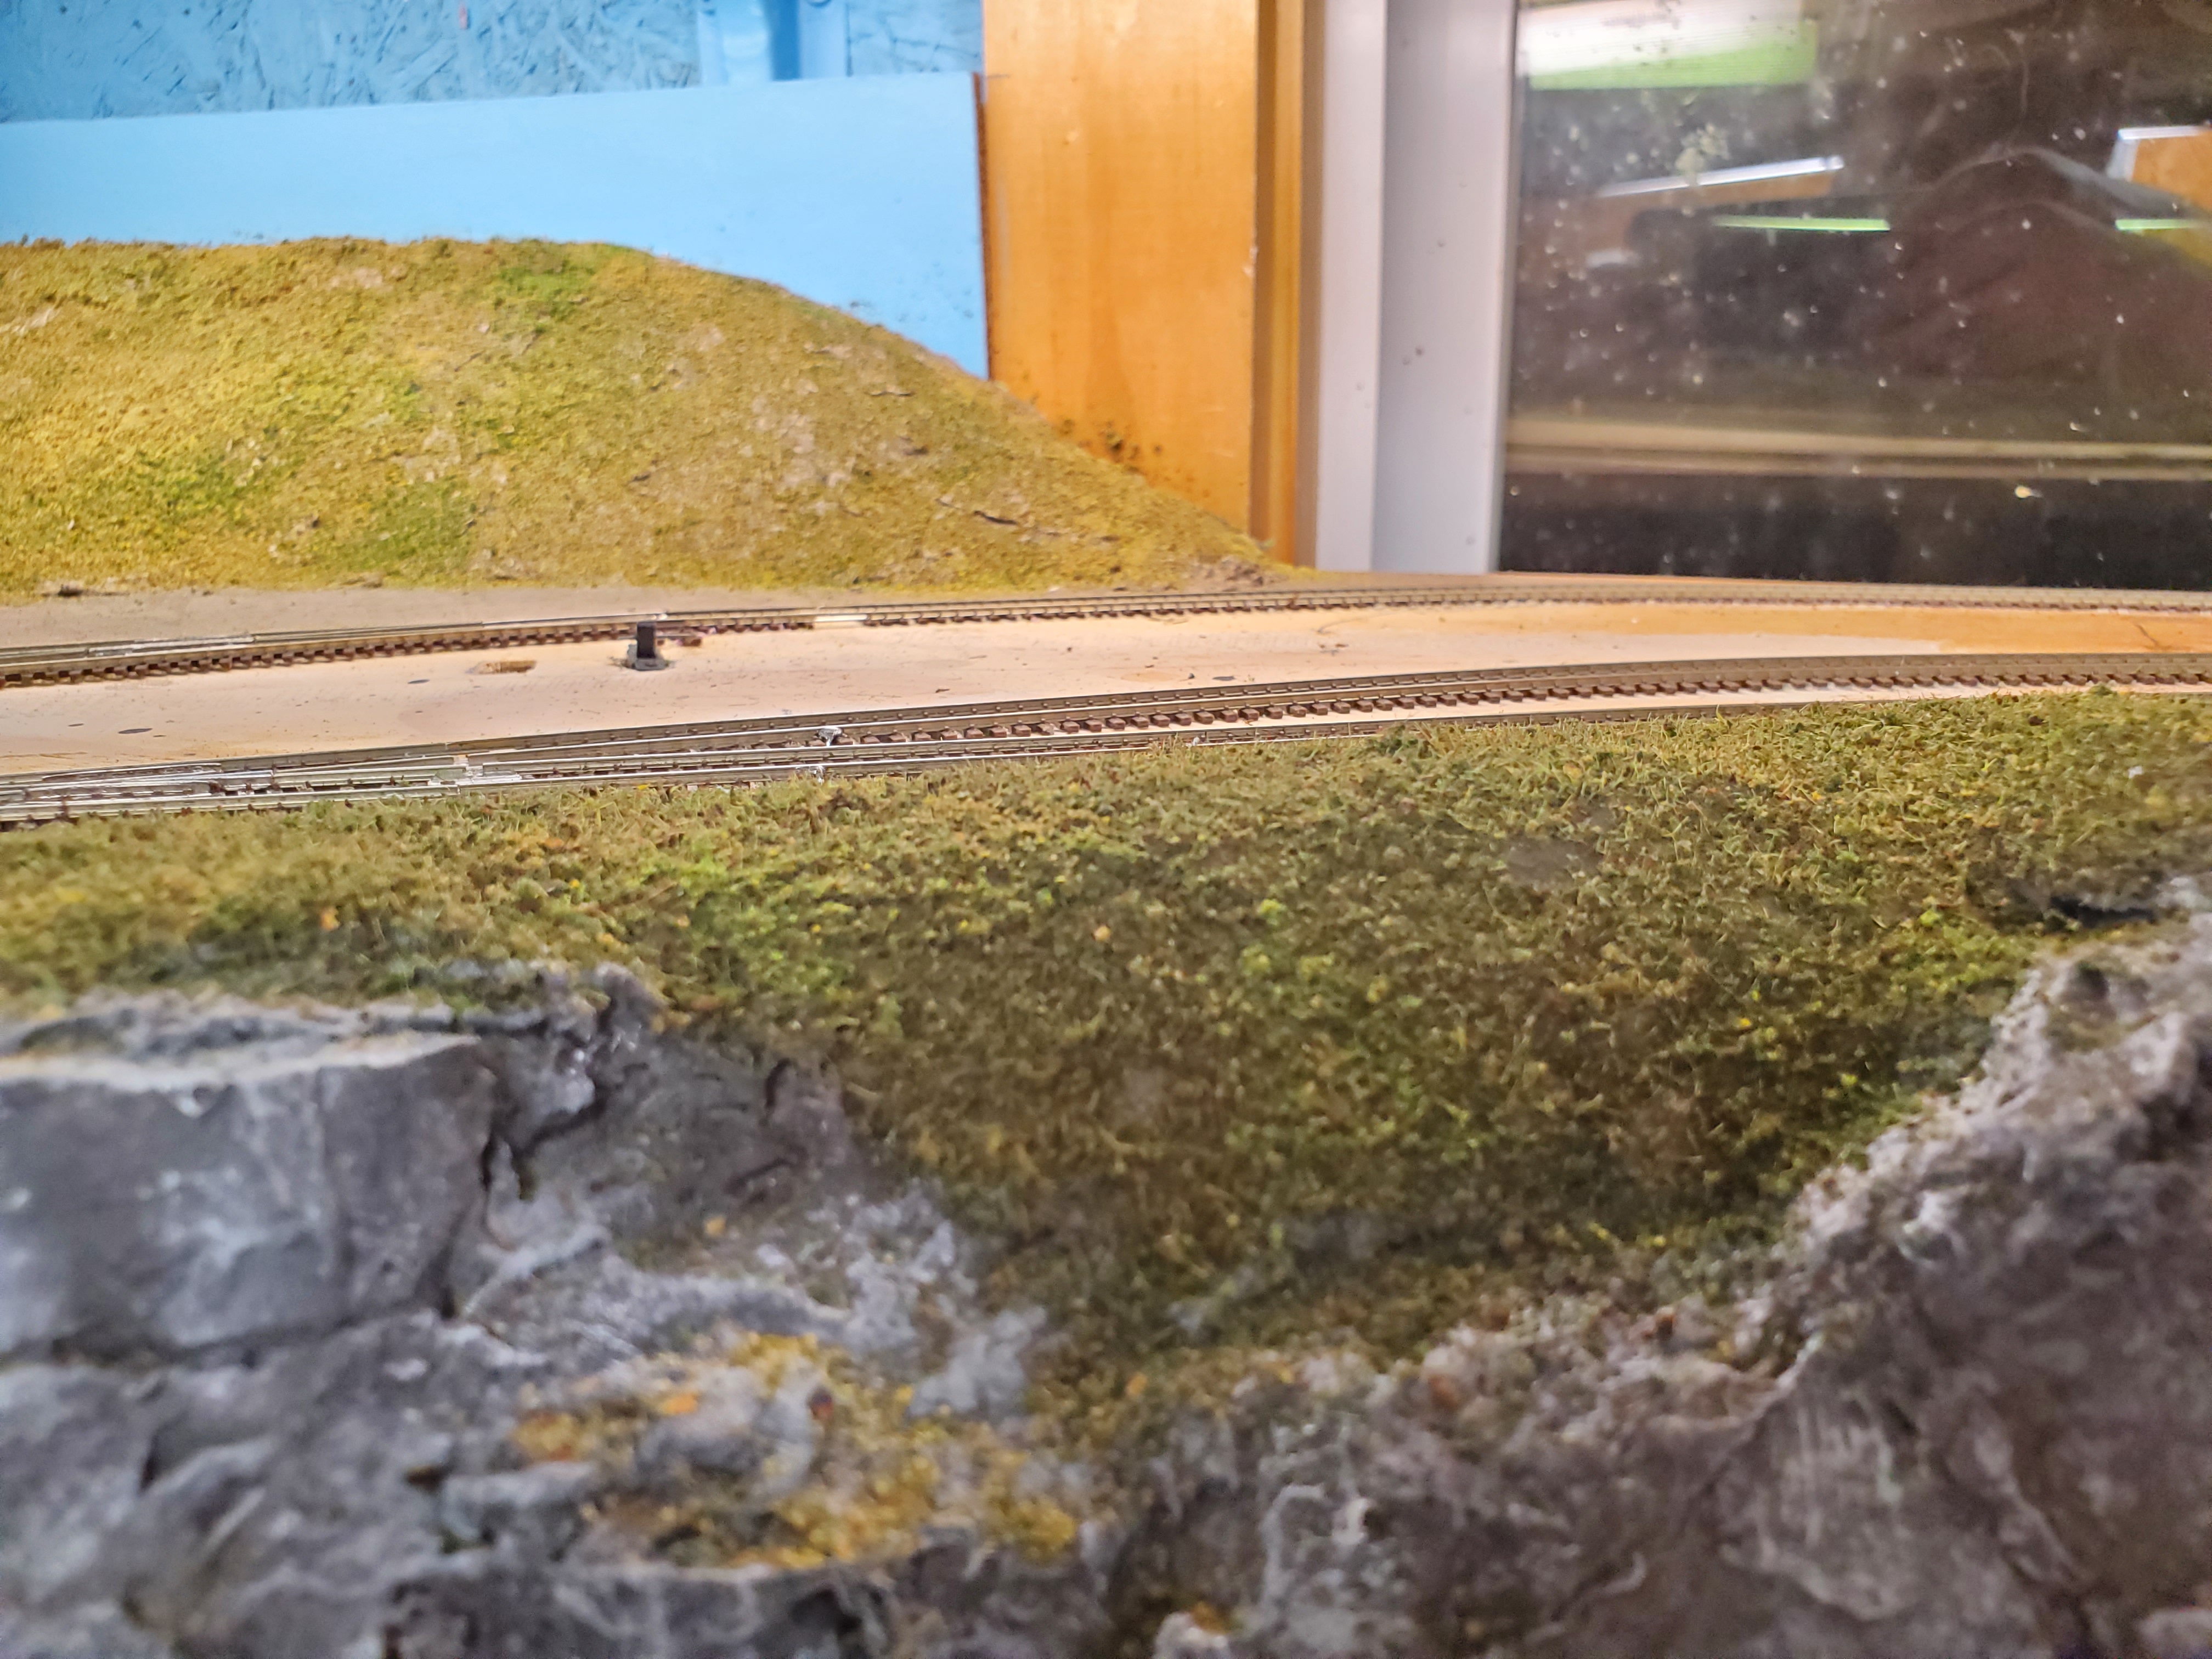
Doug Dederick

Click on the scene pictured to the left to see a YouTube video of scenery tips that I used in scenicking the area by the Sheep Creek Bridge as shown in the pictures below
I’ve been working on the scene where the Sheep Creek Bridge is located near Essex, Montana
Extended the scenery into the aisle with a small bump out
More pictures to follow once the second bridge has been installed and the overall scene is completed


After I completed the scene @ Sheep Creek Bridge I moved on to something I have been putting off BALLASTING ! See below pic’s


Thursday June 18th Doug wrote - Building a snowshed for the GN !
Making the Bents took me a couple of weeks ( 29 total bents)

Next came laying a section of the roof down on the template and gluing each bent to it


Once that was done I turned it over and glued the rest of the roof boards on which took hours. I then turned it upside-down again and glued on the sill plates and shims ( more hours )

Next came the cross sway bracing which was a real pain


Here it is almost completed


Here it is completed and test fitted to it’s new home !


+ + + + + Back to top + + + + +
Corey Ward
Follow Corey's activities on his YouTube channel.
+ + + + + Back to top + + + + +
Ben Maggi
Follow Ben's activities on his blog.
.jpg)
+ + + + + Back to top + + + + +
James Lauser
I finally got some motivation to work on a few miscellaneous tasks on some of my locos, including replacing a coupler on one of my "new" Broadway Limited D&H RF-16As... Part way through I dropped a screw into the chassis. I figured I could probably shake it out, but I didn't even hear it rattling around. Pop the shell, start rooting around inside... Of course the screw found its way to the speaker and got stuck on the permanent magnet.

After a very long hiatus and a few design revisions, I finally got back to building my logging branch. No, this track isn't laid wrong... The logging branch is supposed to be nearly bankrupt and stopped doing anything more than the bare minimum of track maintenance many years ago. The track I'm using is Micro Engineering HO Code 70 preweathered flex track. This stuff is so rigid, it'll hold curves and kinks like this just fine, and maintain absolutely perfect track gauge. My test train ran over it just fine, albeit slowly. Also, no, that last picture isn't crooked... The locomotive is sitting on an brief 8.2% incline. My Bachmann Shay tackles it with barely a sweat (helped out by some Bullfrog Snot on the center truck) It actually has more trouble going downhill rather than up... Slop in the motor gears make it really jerky. The track against the wall is part of a switchback on the logging pike, and will be mostly hidden behind trees when I actually install scenery.


+ + + + + Back to top + + + + +
Jack Cutler
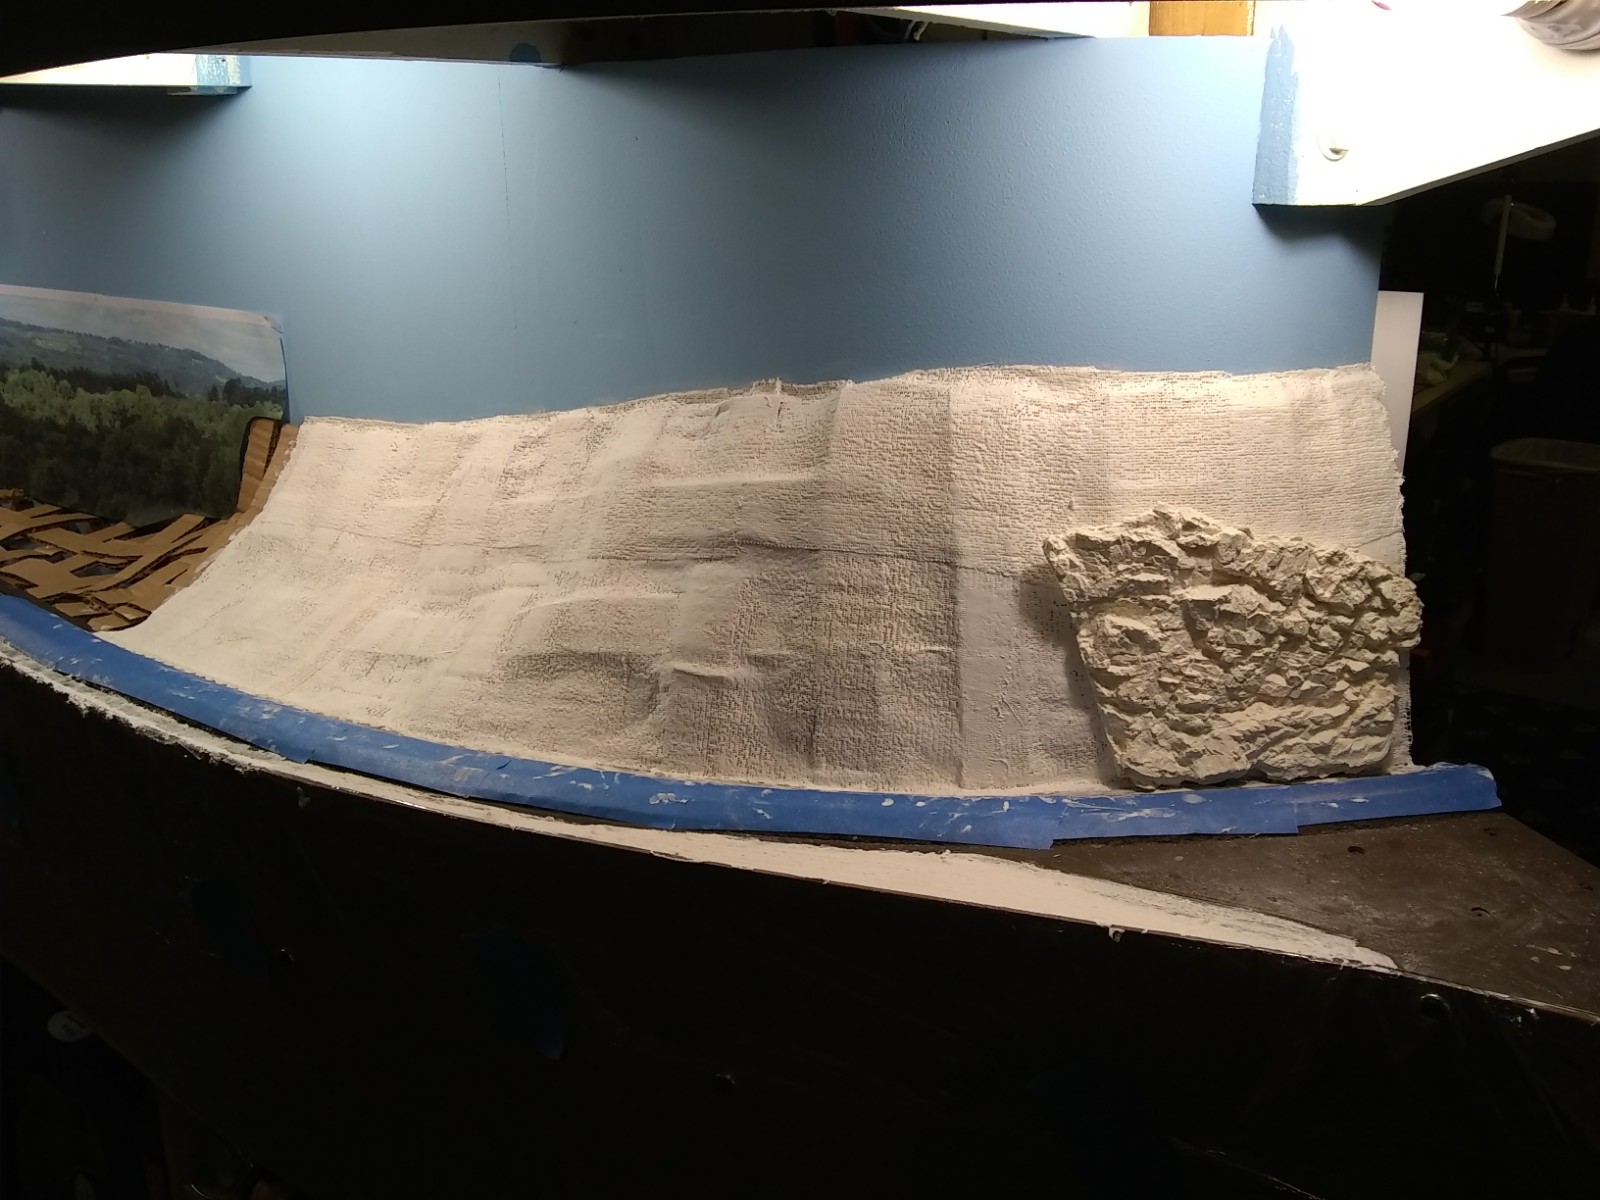
You all know how much I like to do scenery - NOT! Well, I just thought I would share with you what I am working on now – yes, scenery. When I am doing electrical/benchwork/trackwor/signaling/operations etc., I don’t need any motivation to go down to the basement and spend 8 hours or more each day. But scenery? Connie had to motivate me by offering to help, and we started working the scenery around Brearton Gravel. A few photos are attached.
We put up a photo backdrop of a background scene I found from one of Bill Browns LARC CDs. The backdrop you see in an attached photo is not permanent – it is simply a quick-and-dirty printout on standard 8.5” x 11” sheets taped in place (using my favorite blue painters tape) to get an idea of location and look. We then started with land forms. In the photos, you can see the various stages of progress from the bare cardboard strip lattice to covering with plaster gauze to filling in open sections with white foam material.
To fill-in open sections, this time I used the expanded polystyrene (EPS) “bead-board” white foam because I read that when it is shaped using hot wire tools, there are no toxic fumes. In other parts of the layout, I had used extruded polystyrene (XPS) insulation foam (you know, the pink or blue foam sheets) and immediately after shaping it, I was sick for days. And this apparent cause and effect seemed to occur whether I was using hot wire tools or abrasive shaping tools (i.e., inhaling toxic foam fumes or inhaling small foam particles) at different times (months apart). Coincidence? Maybe, but with the pandemic situation we are in, I am taking no chances with my respiratory health. Anyway, I am glad to report that I have no symptoms of being sick after cutting/shaping the white bead foam with hot wire tools. Additionally, the white bead foam I am using cost me nothing because it was packing material I obtained from inside boxes that contained the new appliances for our kitchen renovation project. Safe and cheap!
The last photo is actually on the upper deck at the west end of Abbiville. It shows another progression of land forms, including a section in the back of the photo (under the clock) where I used the pink and blue XPS foam to build a mountain. That section under the clock was done probably 7 or 8 months ago, and working with the XPS foam there is what I think caused me to get sick. So I may name that mountain “Bronchitis Bluff”, or something clever like that!
Stay safe and healthy.


+ + + + + Back to top + + + + +
Bill Brown
Hey guys...hope you are safe and healthy. I saw your latest Form 19 and as always enjoy reading such a professional and interesting newsletter. Since many of your guys were signed up for our cancelled ops weekend, and have operated on my home layout before, I thought I'd send this along as an update of what has been going on here. I have spent the last 6 or 8 weeks doing a lot of basement work as I am sure many of you have. First, I put together two YouTube videos of operations here...one on the modern standard gauge lower level, and one for the narrow gauge upper level. Both are only about 10 minutes long and I thought you might enjoy them. The first 2 minutes or so of both are the same and then they branch out separately. Here are the links:
In addition I have added some items of significance. Those of you that operated here on the narrow gauge upper level know that I have used milk crates to stand on to reach some spots. No more! I have constructed sturdy step boxes in each of the areas. Much more stable and safe.
Past operators on the narrow gauge might remember that the location of the Yankee Girl mine only had an empty siding with a photo of the future structure. Well the future is finally here!. Attached are two photos...one of the real structure from 2010 when Bob Hamm and I hiked to it. The other photo is of my model.
Another major addition is the remake of Ridgeway. I have scratch-built the roundhouse, and added some new structures to the main street. See the attached photo. One other addition there is the scratch-built water tank. Research tells one that in 1941 the roof caught fire and burned. It was removed and was never replaced. Since my layout is set in 1949 I built the tank without the roof. Two photos are attached...one of the pre-fire actual tank, and one of my post-fire/roof model.
Another area of significant improvement that Ops til You Drop folks would have noticed is the finishing of Durango with a full engine facility including an operating turntable and roundhouse. A photo is attached.
Lastly is a structure that I added in my Durango that has an interesting story. Right next to the Durango depot there is a pub called the Palace Quiet lady Tavern. Back in 2013 Bob Hamm, Carl Smeigh, Russ Grills and I spent an entire afternoon on the deck watching the procession of Durango and Silverton trains while consuming some burgers and several adult beverages. Even though my layout is set in 1949...well before the Palace existed...I could not resist building it next to the Durango Station. Hey, this is MY PLANET! I have attached two photos...one of the actual scene of us boys...and one of my model...also with the boys!
Hope you guys enjoy this update.


+ + + + + Back to top + + + + +
Fred Gemmill
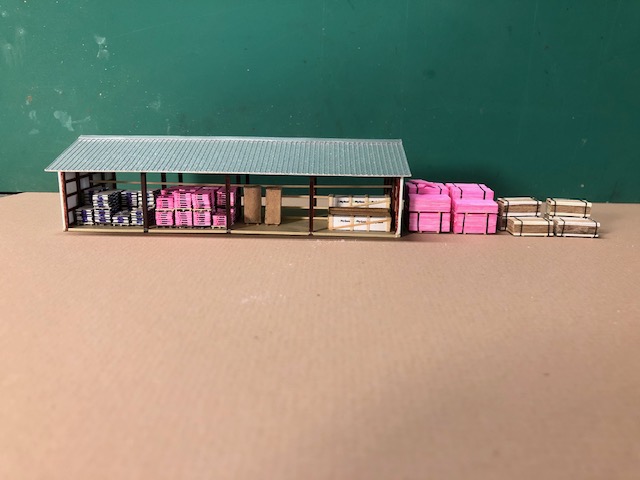
Photos below show some of the projects that I have been working on. The grain elevator, propane distributor and details for my lumberyard (Curtis Lumber). I’m making a cedar hedge right now.


+ + + + + Back to top + + + + +
John Valachovic
John has been working on a couple different projects on the Raquette Lake Railway during the Covid 19 situation.
I feel it is important to make the layout room as nice as possible, this is especially important when you are building a layout for operations. My layout room used to be an old wood shed built off the back of my old farmhouse, I have put a lot of time and effort into making it as finished of a space as possible. One of my projects was finishing the base under Carter Station. This base has my DCC components in it and now a finished bookshelf. I also added a timer to control the layout and some additional outlets. I used an olive drab paint over Masonite for this and my fascia. I also blatantly ripped off the use of finish washers and drywall screws to mimic rivets from Doug Dederick. When painted olive drab it approximates the appearance of a heavyweight passenger car. I also built custom car card boxes and fold down shelves to use for sorting cards. As a finishing touch, I added foldaway drink holders.
On the scenery side I have been working from Uncas Station on the Raquette Lake Railway into the entrance of Raquette Lake Village and also Rondaxe Logging Company Camp 53. The culvert along the old Uncas Road is done with the exception of adding more trees plus the beaver pond on the cinder fill coming into Raquette Lake is just about there. I have been using plastic air fern and chopsticks to build large spruce trees. The rock work below the logging camp is progressing and is ready for some flocking. There will not be many trees in this area so they do not get broken by operators working the logging camp. I maintain a Facebook Page for the layout "Raquette Lake Railway in N-Scale", feel free to follow along on my progress.


John has been working on a couple different projects on the Raquette Lake Railway during the Covid 19 situation.
Scenery has been progressing on the Raquette Lake Railway. The outlet of the beaver dam got some more treatment, some brush may be added next to fill it out a bit. I used Woodland Scenic’s Realistic Water and their Water Effects for all of my water work. The base is the Realistic Water and then I stipple on the Water Effects. I’m very happy with it as it looks great and doesn’t have a lot of odor. I also added the second stage of ground cover and details in the recently logged area around Camp 53. I like to use all different materials in a layered effect. You will also note, I use way more of the Golden Blend then Green Blend for my initial layers. Most of my scenery is in the woods and my season is early Fall so I am pushing the visual of recently dropped leaves and forest floor clutter. I used Woodland Scenic cast metal stumps in the cut area. I also have been adding saplings and trees along the Raquette Lake Railway where it goes through the wall and up the mountain towards the logging road going into Camp 53. I am a fan of forcing sightlines to direct the viewer’s gaze. I do not have the room to model the whole line, so I am concentrating on specific areas for the viewer to observe. The hillside above the Raquette Lake Railway will be more heavily wooded than along the Rondaxe Logging Line heading into Camp 53 due to active logging activity. I placed a Lombard Steam Tractor on the upper skid road returning to Camp 53 to get a feel for the scene. A good example of how I tackle the layering of scenery is the area I’m working on near Camp 53 on the rock cuts. In the background I’m using about 75% Golden Blend and 25% Green Blend, in the foreground, I used Scenic Express forest floor which has some static grass mixed in. There will be mostly stumps in the foreground and any vegetation will be carefully placed so it doesn’t get knocked around by operators. I have the rock work come up enough to mask the slide switch ground throws when taking photos on the Raquette Lake Railway ROW below. The background will be a mix of fresh cut and old cut areas leading up the new haul road leaving camp. I’m leaving room for a Blacksmith Shop, Mess Hall/Dormitory, stables and unloading ramps for supplies and equipment in the Camp also.
Now that summer is finally here, I have way less time to work on the layout than I do in the winter but I’m plugging away. I’m hoping to start working back west towards Eagle Bay during the summer with the goal of having at least basic layers of scenery done from Camp 53 to Eagle Bay. I also have been applying gold vinyl letters to my fascia and car card boxes so visitors and operators have a better idea of where they are. A fresh shipment of letters just came so I can finish that up. Also I will be hopefully working on my custom car cards and waybills and getting away from the generic quickie cards I have now. I’m anticipating out of town work this summer, should be a great time to do car cards! I already have a digital database of almost all my rollingstock in general and all of my rollingstock that is on the layout for operating so I am part of the way there.


+ + + + + Back to top + + + + +
Floyd Barwig
What I’ve Been Working On
My HO railroad is based on the D&H from Ticonderoga to Port Henry with interconnections along the way. The era is the early to mid 1950s. The layout has two levels. On the first level, there is a staging yard in a room adjacent to the main train room. Trains can run north or south from this staging.
At Ticonderoga, there will be a branch line to the paper mill. North of Ti, there is an interconnection with the Champlain and Sanford Railroad, an electrified railroad from Addison Junction to Tahawus that was planned in the early 1900s, but never built. Segments of a later post-WW2 version of this line (intended to avoid going through State land as the line from North Creek to Tahawus does) can still be found on Essex County property maps. The interconnection and a short segment of this line are represented on the layout. Next, the interconnection to the Crown Point and Ironville Railroad is represented as if that railroad were still operating.
At Port Henry, the D&H had a small roundhouse. The interconnecting Lake Champlain and Moriah had a larger roundhouse, car shop and related facilities. I have compressed them into one larger shared facility. On the lower level, the D&H goes back to the hidden staging after Port Henry.
The upper level of the railroad is the LC&MRR. It is reached by a 7’ diameter helix from Port Henry to the upper level. On the upper level, an open pit mine is located within the helix. I eventually plan to model a good bit of the mining operations that the LC&MRR served.
At this point, much of the railroad is benchwork.
The Clonan mineshaft was opened in the early 1900s. The building contains the vertical shaft above ground, primary crushers in the adjacent structure with the sloping walls/roof, storage, and a loading area in the lowest part of the building (the farthest away in this picture)
Photographs from the Moriah Historical Society's annual calendars an and article in the July 23, 1910 Mining and Engineering Journal were my main reference materials. This article included a cross section of the building, giving me heights and roof angles, a floor plan of the second story of the original power and hoisting house, and a photo showing the two. The building changed over time. Originally, it had two tracks under the crushers. By 1950, those were gone. What you see is my interpretation of the building, showing it largely as it was originally built, but without the tracks under the crushing plant.

The building is all styrene. Note that I have left the concrete piers under the columns at the rear of the building off; they snap off too easily in handling so I won't install them until the building is permanently in place.

The frame above the loading area supports sheaves that guide the hoisting cables from the hoisting drums in the power house to the sheaves inside the top of the shaft.

The original powerhouse was a tee-shaped building with the leg of the tee extending behind the building as shown here. It also had vertical gables on each end. It contained coal-fired boilers and had a 90' stack to run all the equipment by steam. Somewhere along the way, the tee and stack vanished, the gables became hipped roofs, and the whole thing was electrified. I contempleted building the original, but it didn't fit and would be out of character for my era. Starting from the end nearest the camera, the building contained a drill shop, machine shop and hoisting drums. Compressors for ventilation and air tools were on the lower floor.
The building is styrene with resin "concrete block" columns that I cast from a mold made with N-Scale Architect concrete block sheet material and strip styrene. The panels between columns are also N-Scale Architect sheets.


+ + + + + Back to top + + + + +